
Spring Cloud 微服务入门教程(一):微服务介绍 Spring Cloud 微服务入门教程(二):服务注册与发现-Eureka Spring Cloud 微服务入门教程(三):微服务的注册 Spring Cloud 微服务入门教程(四):微服务间的调用消费-FeignClient Spring Cloud 微服务入门教程(五):统一配置中心-ConfigService Spring Cloud 微服务入门教程(六):Spring Cloud BUS 消息总线实现配置中心动态更新配置文件 Spring Cloud 微服务入门教程(七):Spring Cloud Stream 消息队驱动式的微服务 Spring Cloud 微服务入门教程(八):Spring Cloud Zuul 服务网关动态路由和Cookie头信息传递和跨域 Spring Cloud 微服务入门教程(九):网关 Zuul 整合 Swagger2 实现自动生成 RESTful API 文档 Spring Cloud 微服务入门教程(十):Spring Cloud Hystrix 服务熔断和服务降级 Spring Cloud 微服务入门教程(十一):Spring Cloud Sleuth zipkin 服务追踪链路监控 Spring Cloud 微服务入门教程(十二):Spring Cloud Docker 容器化部署
代码 将在https://github.com/NeilRen/SpringCloudDemo进行分享,按不同的分支分享不同的章节代码,Master分支就是最后所有的内容合集。本章节代码在:https://github.com/NeilRen/SpringCloudDemo/tree/feature/config-server
原创 本篇文章是原创文章,作者:任霏,转载请注明作者和出处
上一节《Spring Cloud 微服务入门教程(四):微服务间的调用消费-FeignClient》我们讲了微服务的新建和服务间的调用消费,随着微服务的增多,那么多SpringBoot程序,修改他们的配置文件会是很恐怖的工作量,所以微服务架构中还为我们提供了配置中心,这样可以方便统一的管理我们的服务配置文件,同时线上生产环境的配置是不对开发人员开放的,这样只需要运维人员维护线上的配置中心即可。
新建一个配置中心模块
新建一个名为「config」的模块作为配置中心提供的服务,如何新建模块参见之前的章节文章,代码也上传到Github了,在次不再赘述,只关注新增的东西。「config」要比上一章节前的「demoservice」多一个依赖:spring-cloud-config-server,POM文件是:
<?xml version="1.0" encoding="UTF-8"?>
<project xmlns="http://maven.apache.org/POM/4.0.0"
         xmlns:xsi="http://www.w3.org/2001/XMLSchema-instance"
         xsi:schemaLocation="http://maven.apache.org/POM/4.0.0 http://maven.apache.org/xsd/maven-4.0.0.xsd">
    <parent>
        <artifactId>cloud</artifactId>
        <groupId>net.renfei</groupId>
        <version>1.0.0</version>
    </parent>
    <modelVersion>4.0.0</modelVersion>
    <groupId>net.renfei</groupId>
    <artifactId>config</artifactId>
    <version>1.0.0</version>
    <name>config</name>
    <description>配置中心</description>
    <dependencies>
        <dependency>
            <groupId>org.springframework.cloud</groupId>
            <artifactId>spring-cloud-starter-netflix-eureka-client</artifactId>
        </dependency>
        <dependency>
            <groupId>org.springframework.cloud</groupId>
            <artifactId>spring-cloud-config-server</artifactId>
        </dependency>
        <dependency>
            <groupId>org.springframework.boot</groupId>
            <artifactId>spring-boot-starter-web</artifactId>
        </dependency>
    </dependencies>
    <build>
        <plugins>
            <plugin>
                <groupId>org.springframework.boot</groupId>
                <artifactId>spring-boot-maven-plugin</artifactId>
            </plugin>
        </plugins>
    </build>
</project>
然后新建包名net.renfei.config,和程序启动入库类ConfigServerApplication,代码如下:
package net.renfei.config;

import org.springframework.boot.SpringApplication;
import org.springframework.boot.autoconfigure.SpringBootApplication;
import org.springframework.cloud.client.discovery.EnableDiscoveryClient;
import org.springframework.cloud.config.server.EnableConfigServer;

@SpringBootApplication
@EnableDiscoveryClient
@EnableConfigServer
public class ConfigServerApplication {
    public static void main(String[] args) {
        SpringApplication.run(ConfigServerApplication.class, args);
    }
}
在resources文件夹中新增配置文件application.yml,内容如下:
server:
  port: 8114
spring:
  application:
    name: config
  cloud:
    config:
      server:
        git:
          uri: https://github.com/NeilRen/SpringCloudDemo.git
          search-paths: springcloud-config
#          username:
#          password:
#          basedir:
eureka:
  client:
    service-url:
      defaultZone: http://localhost:8761/eureka/
management:
  endpoints:
    web:
      exposure:
        include: "*"
application.yml中配置了启动端口、应用名称,eureka注册中心地址,还多了spring.cloud.config.server的配置,这里的意思是从Git仓库拉取配置文件,我这里设置的是Github的项目地址,所以用户名和密码都是不需要的,search-paths是指去哪个文件夹下面搜索配置文件。
在Git上新增配置文件
在Git上面新增服务的配置文件,我这里新建了DemoClient-dev.yml、DemoService-dev.yml,地址在:https://github.com/NeilRen/SpringCloudDemo/tree/master/springcloud-config,我们以DemoService-dev.yml为例,解释一下。
首先是命名规则:{application}-{profile}.yml,前面是应用名称,后面是环境配置,那DemoService服务的Dev环境配置文件就是DemoService-dev.yml的命名。
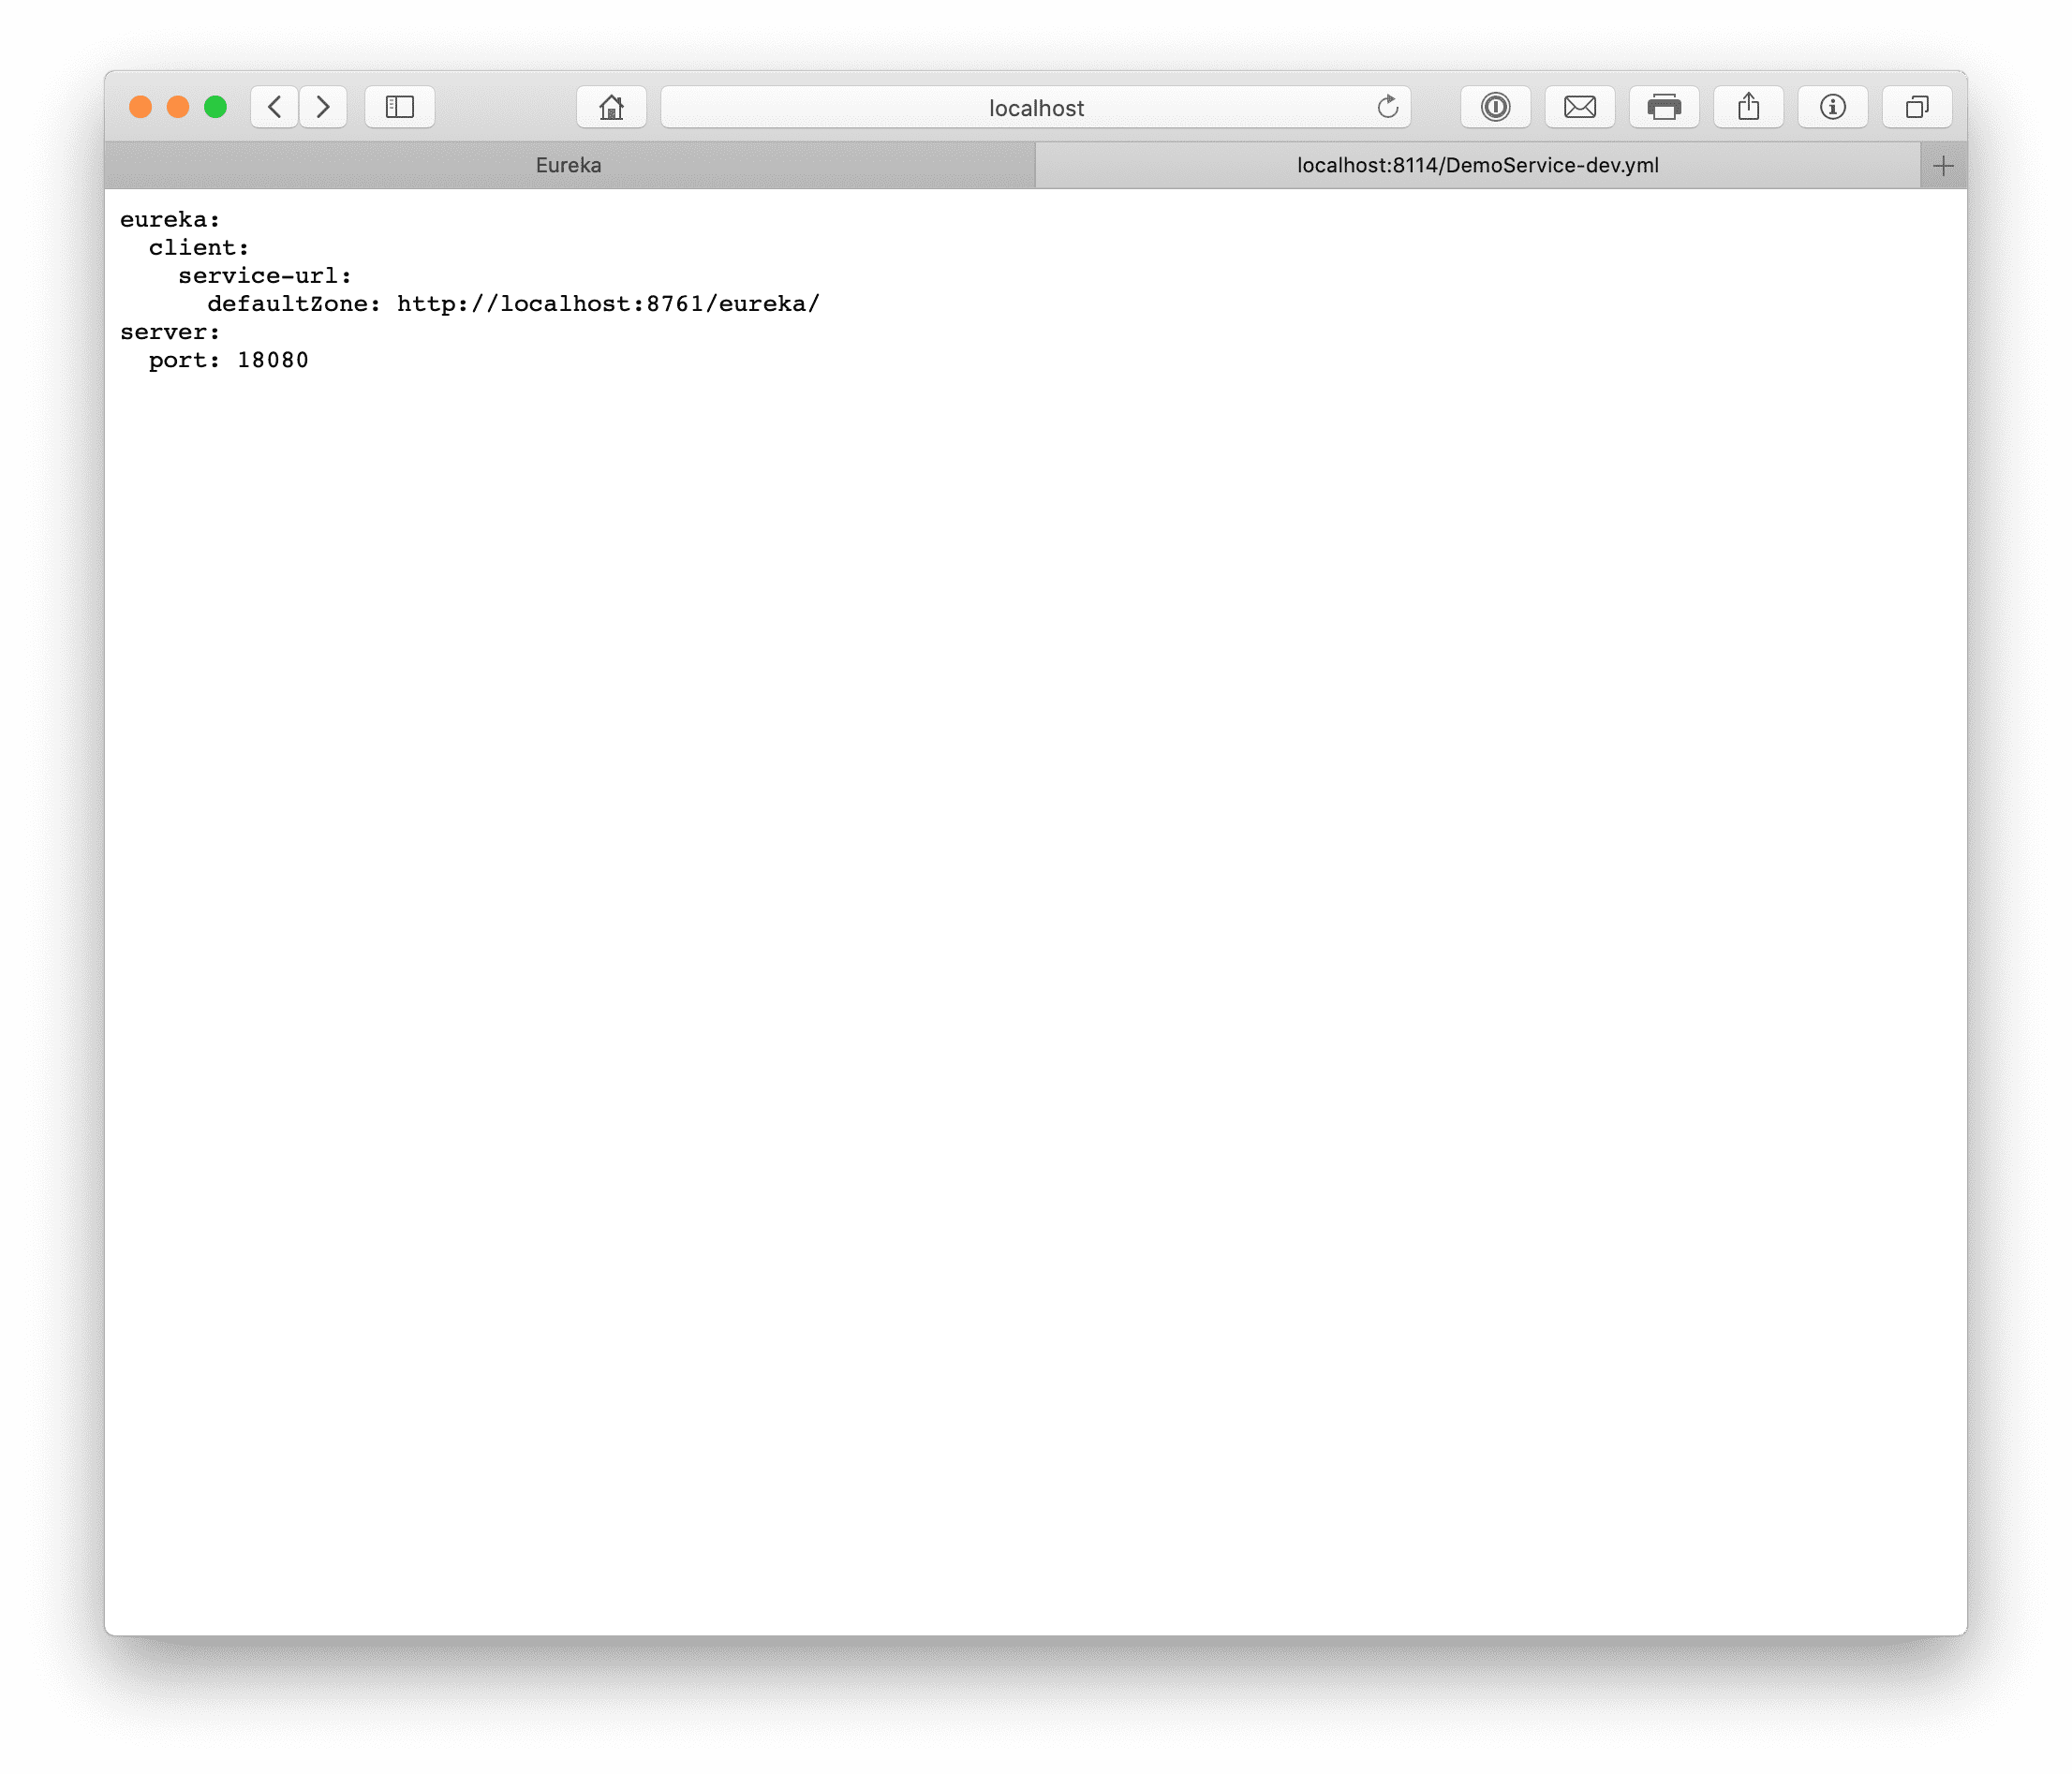
然后是内容,其实除了application.name和spring.cloud.config配置相关的,其他都能放进去远程加载,例如启动端口号、数据库地址等等。在这个章节中我的DemoService-dev.yml在Git中的内容是:
server:
  port: 18080
验证配置中心
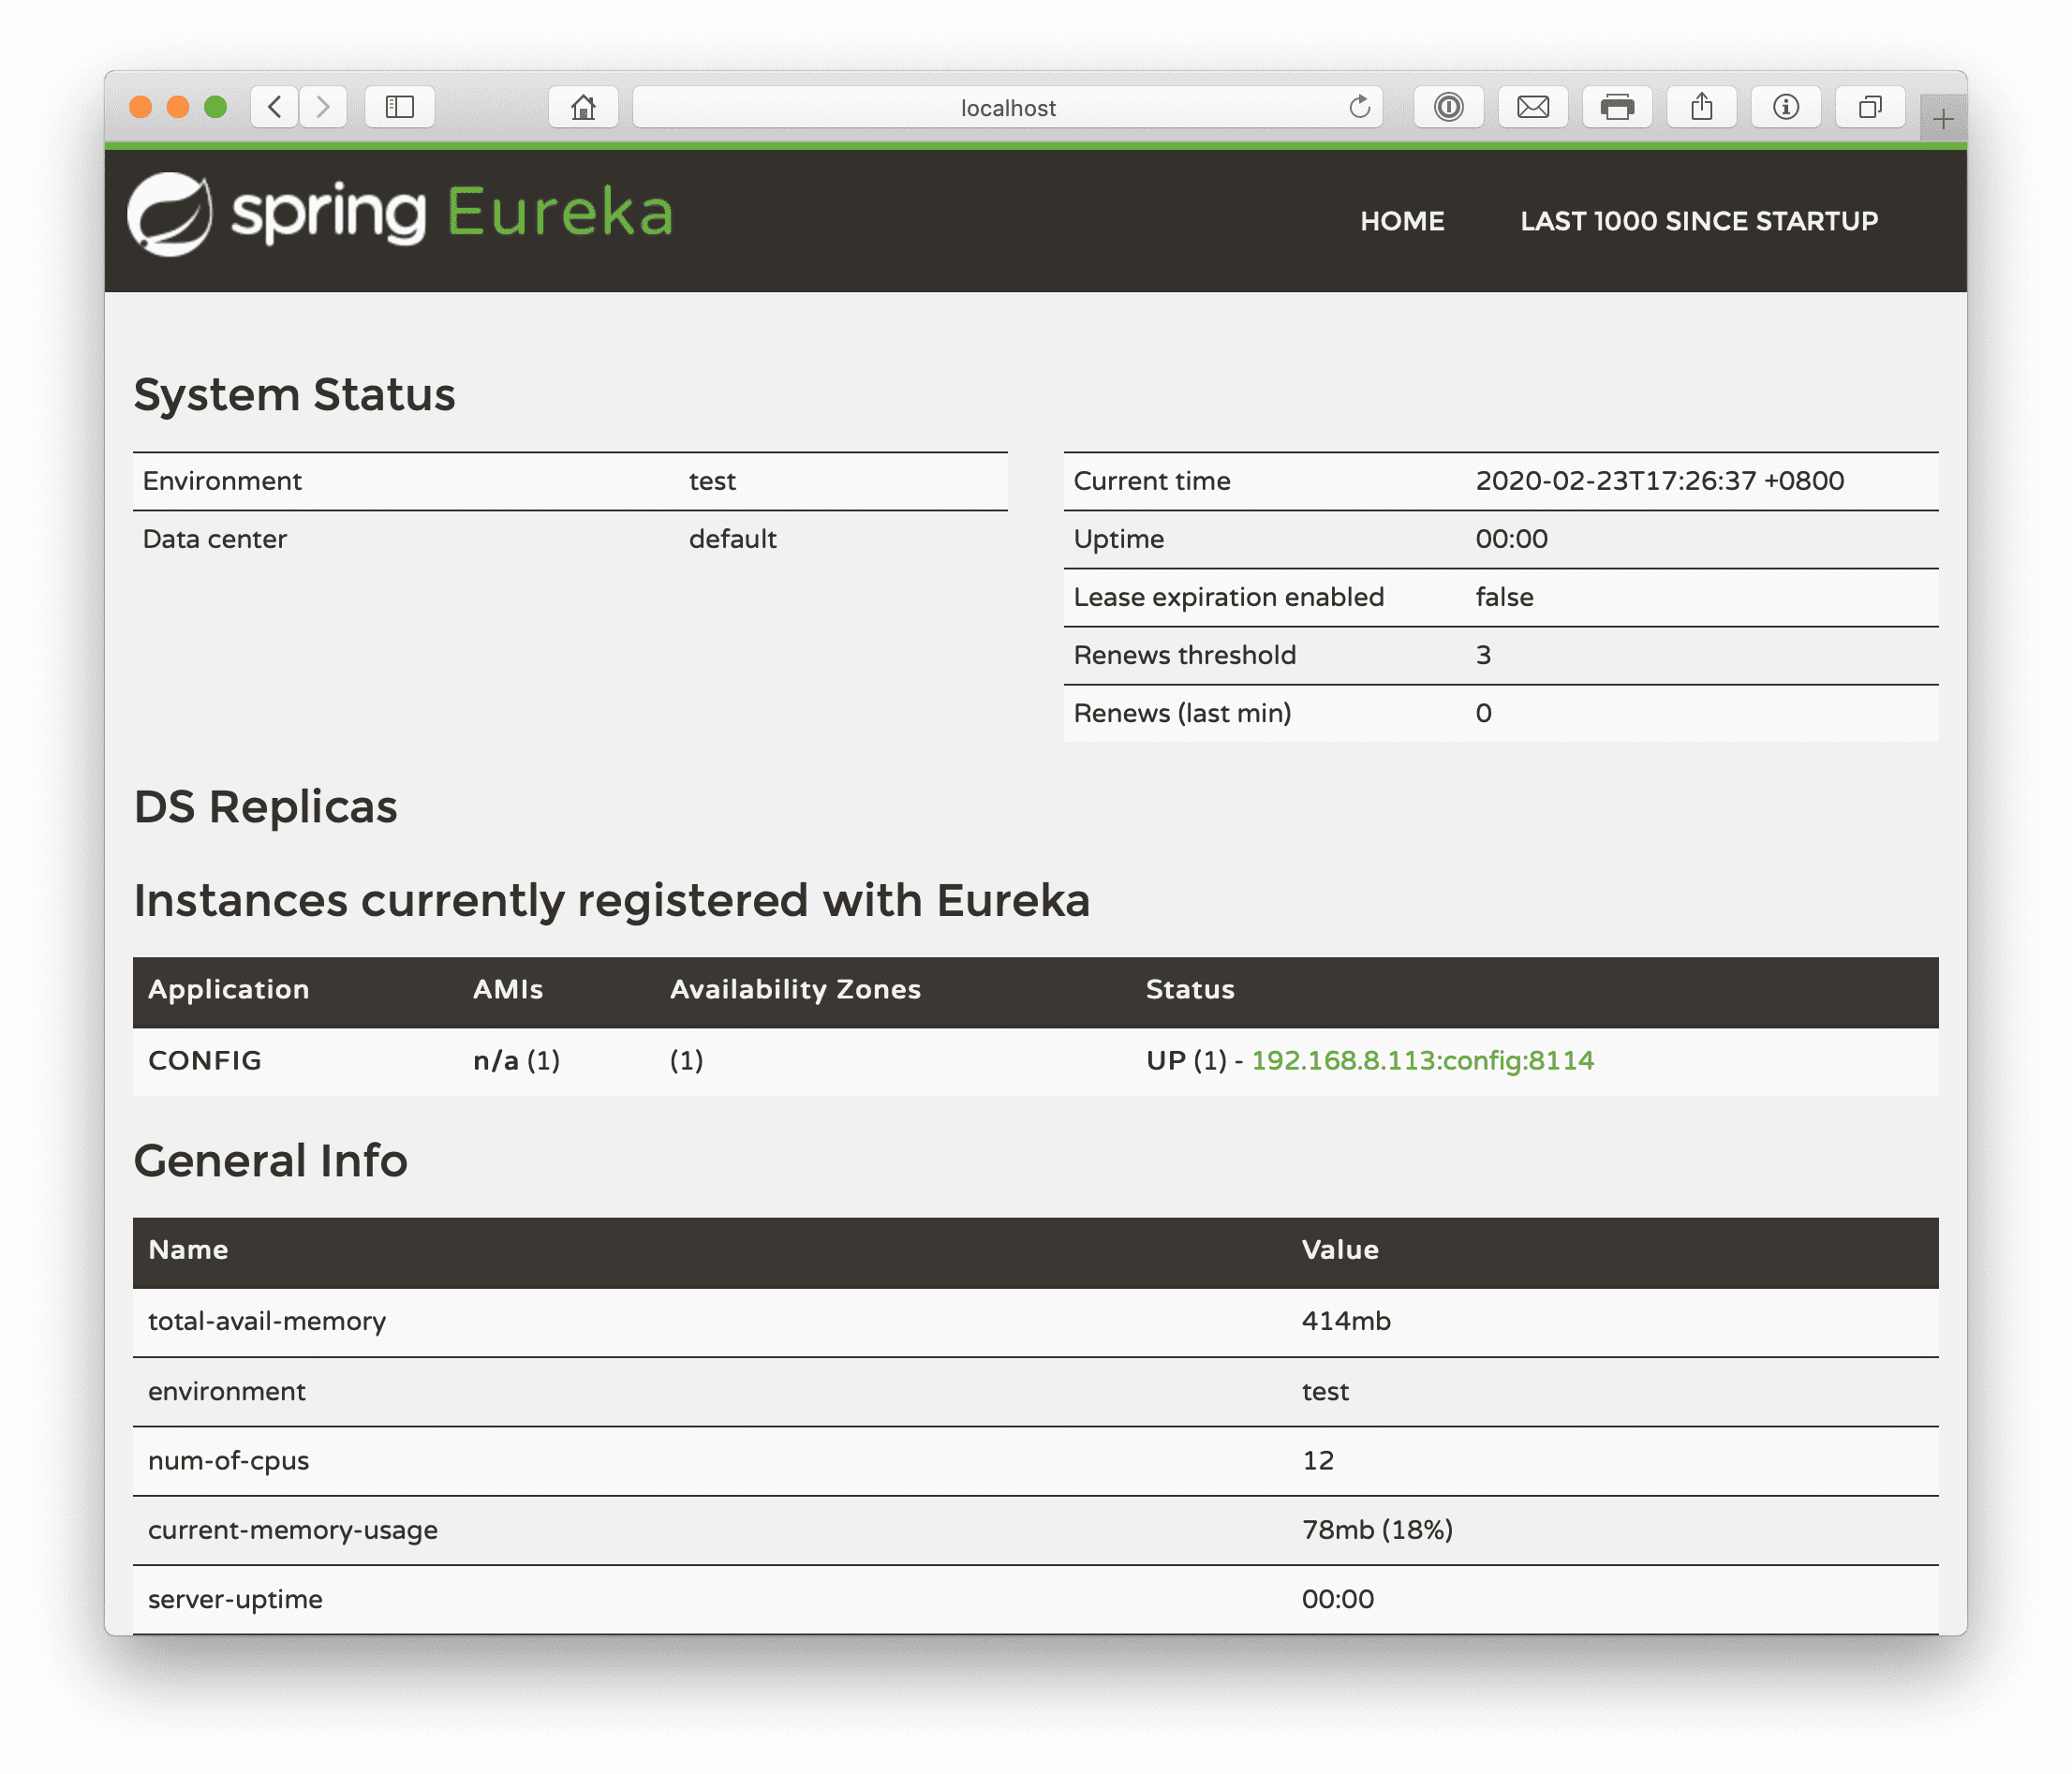
我们启动eureka注册中心以后,再启动config配置中心,然后可以看到config注册成功,访问的地址本章节示例的地址是:http://localhost:8114/DemoService-dev.yml,其实不仅仅支持yml格式,如果你访问http://localhost:8114/DemoService-dev.json就会自动转换为json格式,也就是说,配置中心是可以自动转换需要的配置文件格式的。
改造服务从配置中心拉取配置
我们以DemoService服务为例,其他服务也是同样的改造方法:
修改POM文件增加spring-cloud-config-client的依赖,本章节DemoService服务示例:
<?xml version="1.0" encoding="UTF-8"?>
<project xmlns="http://maven.apache.org/POM/4.0.0"
         xmlns:xsi="http://www.w3.org/2001/XMLSchema-instance"
         xsi:schemaLocation="http://maven.apache.org/POM/4.0.0 http://maven.apache.org/xsd/maven-4.0.0.xsd">
    <parent>
        <artifactId>cloud</artifactId>
        <groupId>net.renfei</groupId>
        <version>1.0.0</version>
    </parent>
    <modelVersion>4.0.0</modelVersion>
    <groupId>net.renfei</groupId>
    <artifactId>demoservice</artifactId>
    <version>1.0.0</version>
    <name>demo-service</name>
    <description>演示服务</description>
    <dependencies>
        <dependency>
            <groupId>org.springframework.cloud</groupId>
            <artifactId>spring-cloud-starter-netflix-eureka-client</artifactId>
        </dependency>
        <dependency>
            <groupId>org.springframework.boot</groupId>
            <artifactId>spring-boot-starter-web</artifactId>
        </dependency>
        <dependency>
            <groupId>org.springframework.cloud</groupId>
            <artifactId>spring-cloud-config-client</artifactId>
        </dependency>
        <dependency>
            <groupId>net.renfei</groupId>
            <artifactId>apicenter</artifactId>
            <version>1.0.0</version>
        </dependency>
    </dependencies>
    <build>
        <plugins>
            <plugin>
                <groupId>org.springframework.boot</groupId>
                <artifactId>spring-boot-maven-plugin</artifactId>
            </plugin>
        </plugins>
    </build>
</project>
重命名application.yml为bootstrap.yml
因为需要在程序启动时拉取配置文件,所以之前的application.yml就不能满足要求了,需要使用bootstrap.yml,这样在程序启动时会去配置中心拉取配置文件,bootstrap.yml内容为:
spring:
  application:
    name: DemoService
  cloud:
    config:
      discovery:
        service-id: config
        enabled: true
      profile: dev
bootstrap.yml中声明了application的名称和配置中心的名字,service-id填的就是注册中心中配置中心的名称,profile就是要加载哪个环境的配置文件。
按照同样的改造步奏,将其他服务改造完后,就可以尝试使用配置中心了,注意我的案例中启动顺序是eureka注册中心->config配置中->DemoService服务->DemoClient服务。
到这里配置中心就搭建完了,但是每次修改配置文件还是需要重启,所以下一章节会讲Spring Cloud Bus服务总线来通知服务自动拉取配置,需要依赖一个新环境支持,那就是「RabbitMQ」消息队列,无论是在本机还是使用Docker,要先提前安装一下,下一节的Spring Cloud Bus服务总线依赖「RabbitMQ」消息队列,我们下一节见。